About 2 months ago I was intrigued by the idea of propagating Tropical Hibiscus, essentially making copies of the mother plant through stem cuttings. Six weeks ago my first experiment failed. I made stem tip cuts (soft and hard wood), putting the cuttings in a pot of moist perlite after dipping in a rooting hormone. The pot of perlite and cuttings is then placed in a saucer of water, allowing the perlite to wick the water as needed. The experiment failed because I didn't cover the cuttings with anything. Within a few days the leaves actually started to yellow and fall off.
So I revised my next experiment by covering the cuttings with a polythene plastic bag. On July 19th I made 5 hardwood stem cuts of Red Snapper hibiscus, dipped in rooting hormone, stuck them in the perlite pot and then covered. Covering the cuttings creates a greenhouse atmosphere of high humidity which prevents water loss. Several days go by and no yellowing like before. I noticed a huge difference by covering vs not covering. After 4 weeks look what I found....ROOTS! =)
Potted up the cuttings in their own gallon size pot with Miracle-Gro potting mix.
One hibiscus hybrid I grew from seed, the "Red White Splash", doesn't want to root very well. The leaves quickly wither down and fall off within a few days. I'm experimenting to see if this one will root, so today I setup a new cutting. The cutting is an all green stem tip about 3-4" long. I removed all the lower leaves except the top two. I dipped the end into Rootone and placed the cutting into a mix of Miracle Gro Seed Starting and perlite. I made sure there were 3 nodes buried in the Miracle Gro mix. I covered the cutting with an empty 2 L bottle with the bottom cut out. Just keep the cap screwed in to lock in moisture. The idea is to keep humidity in to prevent moisture loss from the leaves, hence the name Greenhouse Experiment in the title. Also I don't want to cook the plants either so I have to keep the covered cuttings out of direct sunlight.
Here is day one, fresh green stem tip cutting of "Red White Splash" hibiscus hybrid.
This upside down 2 L bottle creates the greenhouse environment.
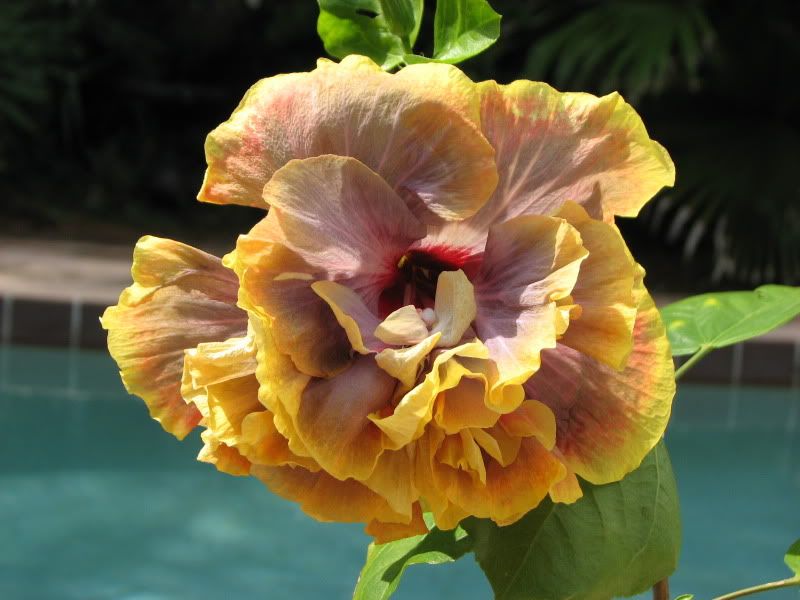
In 2009 I learned there is actually an international society geared towards hibiscus hybridizing. They have hibiscus of the year voting and all that stuff too. Some of the hybrids that are generated look amazing, nothing like you can find in Home Depot or Lowes. In 2009 second place was awarded to Gator Magic, a Florida hybrid created by Bob Carran. I had to have it so I purchased it online. Here's a photo of my first bloom...
As you can see this is a plant worth having, only problem is it's hard to find now. I searched and came up with nothing, even eBay didn't have it. My option now is to clone this plant myself using propagation. The plant itself was neglected for a long time in a pot, which most of the soil leaked out. I'm surprised it's still alive. Nevertheless, I lucked out and it's still going. I pruned and repotted in fresh new potting soil. It has a bud growing on the top, so I didn't want to cut that stem. I found a small 3-4" tip cutting that will work though. I am using the water method to root this cutting since it's mostly tender green stem. Hopefully it works, if it doesn't, I still have a nice stem cutting waiting for me after the bud flowers. :)
Today I took some cuttings off some of the hibiscus I grew from seed in 2009. I'm using a gallon pot with side holes on the bottom. Fill the pot 2/3 full of moist perlite and sit inside a saucer of water. The water level in the saucer should always submerge the holes in the gallon pot. Because of the wicking properties of perlite, this method should keep the cuttings moist and also provide plenty of oxygen. I put the cuttings in a partial sunny area that doesn't get direct afternoon sunlight. In 4-6 weeks I should have duplicate mini copies of the plants below...
3 cuttings of Rosalind x Dragons Breath (image below)
2 cuttings of Sweet Bippee x Dragons Breath (image below)
Cutting in Perlite Experiment - Day 1
UPDATE 4 weeks later: None of these cuttings survived unfortunately. It was my first attempt and I think I took the cuttings from an already unhealthy plant, plus the stems were from last years growth I think. These hibiscus plants were neglected for so long but now repotted and bouncing back. Another thing I didn't do is cover the cuttings hold moisture in the leaves. So this experiment failed but I'll try again. :)
After taking a break from extreme gardening for awhile, and with some free time on my hands, I've decided to revisit the world of plant propagation and development again. In 2009, I started Tropical Hibiscus, Datura metel (purple trumpet), and Plumeria from seed. After successful germination and overwintering, these 6 year old plants are still alive today. Most still in containers as well.
The Datura had seeded itself and was actually growing outside the container. So with a little luck I carefully took it out and repotted it. It's dropping some leaves, but so far hanging on.
I have 3 Plumerias now, neither have bloomed sadly. Although they lacked fertilizer for several years, they are heavy feeders. In the picture there is one large and two smaller plumerias that just need bigger pots. All three plumerias are 6 year old plants, so you can see how much space for roots makes a huge difference in overall plant size and growth.
A few years ago I purchased a Purple Passionflower vine (Passiflora incarnate). It's a host plant for the Gulf Frit butterfly. The wasps have controlled the caterpillar population this year, therefore allowing a lot of lush green growth and it's even bloomed several times this year.
The Hibiscus I'll take pictures later when they are in better shape. The containers they were have leaked soil, so they need to be repotted. With a little TLC they will bounce back and should have blooms by the end of the year.
Another first bloom, and this is now my 3rd hibiscus hybrid bloom from seed.
The top side-by-side pictures show the parent plants of Sweet Bippee (left) and Dragonsbreath (right).
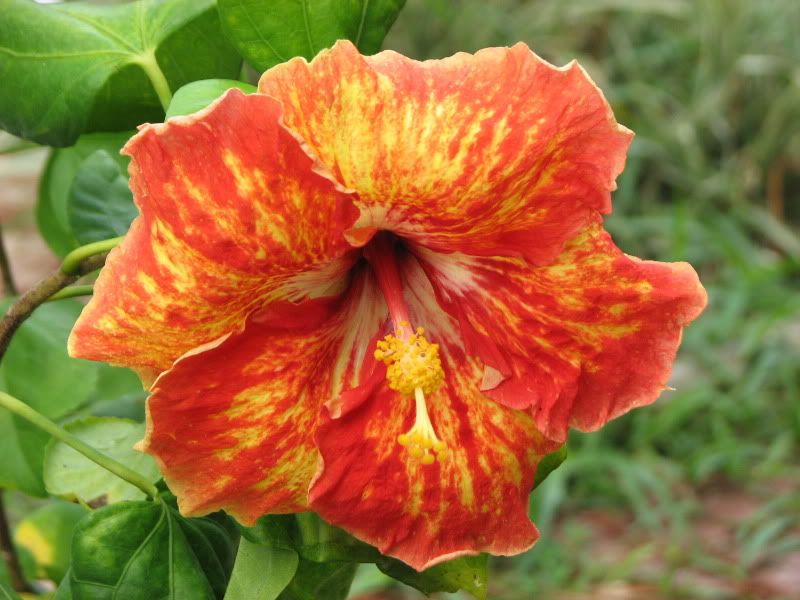
This one is full of colors. It has a pink/white interior that fades out to orange tips, with a slight yellow speckle on the edges. Here it is!
Today I was rewarded with an impressive first bloom on one of my hibiscus from seed. This plant is over 2 years old and finially blooming. It's another hybrid seed crossing from Australia.
The top side-by-side pictures show the parent plants where the seed came from.
Rosalind (left) and Dragon's Breath (right)
And here's the first new flower :)
The first day of September is welcoming after enduring two of the warmest months of the year. July and August have an average daily high of 92°F in Orlando. Even though it's still very hot and wet for weeks ahead, this day marks the beginning of a seasonal change. It means the beginning of Fall-Autumn on September 23, 2011. As days move on we can expect a slow transition of color and weather.
Gall Midge Treatment Update
Only a couple days after my gall midge treatment and the hibiscus look like they are pest free right now, not even an aphid was found last time I checked. I'm pretty sure it's killing the gall midge larvae too since I've noticed a few more healthy blooms on the white hibiscus.
Upcoming First Blooms
I have 2 more hibiscus plants that are blooming for the first time which means sometime this month I'll have a few new hybrids to show off. These hybrids were grown from seed for the last 2 years.
Also my Becky's Blue/White passion flower is blooming well, another first flower on this one too. I purchased this plant on eBay this year.
Milkweed Bug Control
Another pest this summer is the Milkweed bug. Once established, they do alot of cosmetic damage to your milkweed. They don't actually kill the plant as milkweed just grows back when it's cut down, but the Monarchs need healthy leaves in order to grow properly. Getting rid of an established milkweed bug colony means cutting back my plants, throwing away the stems with the bugs still on the cuttings. The cuttings go into a trashbag that is sealed leaving the bugs trapped. I absolutely don't use pesticides on my milkweed plants as I don't want to harm the baby caterpillars or poison the leaves. It doesn't take long for milkweed to grow back, in fact they actually look better when you do occassionally cut them back.
Twenty-five months ago I purchased some tropical Hibiscus rosa-sinensis seed from Australia on eBay. The seed are a hybrid crossing from two exotic parent plants. In this case, the parent plants are Sweet Bippee (left) and Dragonsbreath (right).
After 2 years of hard work growing the seedlings in containers while protecting from two of Florida's coldest winters, I still have two of these cross-plants and now they're blooming for the first time. One of the flowers should open up today for the first time too, so it's very exciting. I'm curious to see the colors and patterns in comparison to the parent plants above. No two crosses are the same, or so I've heard. We'll find out if this holds true.
Well here it is, my first hibiscus hybrid bloom! And since I'm the grower of this new hybrid, I can officially give it a name... Red Snapper
Growth has been pretty fast, with only a few minor issues with pests. Had a few aphids attacking an Ornamental Pepper seedling but I took them out with a soapy spray. Also had some thrips attacking Hibiscus bloooms, Plumeria leaves, and Zinnia. They were causing hibiscus blooms to drop prematurely. I took care of this with a couple treatments of Green Light Spinosad spray and now they're gone. Here's a photo gallery of pictures I took today around the garden...
A Mothers Day Lily for someone special
Hibiscus with double blooms
Datura metel 'Purple Trumpet'
Gator Magic, Dancing Fire, and Cosmic Dancer hibiscus
Ornamental pepper seedling
Cody's workshop from Lowe's & HomeDepot
Cody's bird feeder he made @ Lowe's. The doves love it!
Alot of photos to share today! Enjoy =)
New blooms from the Pansies I started from seed...
Alyssum 'Snow Crystals' and Petunia 'Celebrity Red Morn' started from seed..
New landscape statue purchased last weekend at Lowe's. Cute!
At Lowe's Build & Grow, Cody made this See It Grow planter for Earth Day. Planted a couple nasturtium seeds to watch them grow from top to bottom.
Newly planted Hibiscus (purchased at Lowe's) bloomed today.
PROCEED WITH CAUTION: BEE'S AT WORK
Newly planted Squash Contender zucchini...
Tropical Hibiscus and Plumeria started from seed last year...
Datura metel 'Purple Trumpet'
Over-wintered potted Hibiscus recovering and growing new leaves
First bloom today on another tropical hibiscus plant, the Cosmic Dancer. I've had this one for a couple months now and this is the first time it has bloomed. Very bright colors
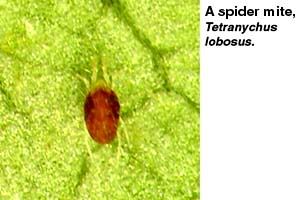
Spider mites are a warm weather problem for several hibiscus growers. They thrive in hot, sunny, and dry conditions when temperatures are high. The first sign of spider mites is when a leaf or two get yellow mottling mixed in its normal green, then slowly the entire leaf turns bright yellow then falls off. Soon more and more leaves turn yellow and fall off, which can be fatal to your plants. As the spider mites spread, you can see very fine webbing at the tips of the branches with yellow leaves.
I've been battling with spider mites for the last 2-3 weeks. As a safe treatment, it was recommended to spray the underside of leaves with a hard stream of water at least once a week. This washes off the spider mites and breaks their lifecycle. However, this method has been ineffective on our large hibiscus plant, which has lost most of it's leaves due to spider mite damage. One by one, the leaves would yellow and fall off within 24 hours. Amazingly, the hibiscus was still blooming well during this time.
I also tried the use of beneficial insects, the Green Lacewing larvae. I received the eggs in the mail from http://www.arbico-organics.com. When I noticed some of the eggs had hatched inside the container, I sprinkled the eggs and live larvae onto the hibiscus plant. This method will reduce the number of spider mites if applied correctly.
I also researched Miticides that were proven effective. The two name brands I found most popular are Forbid 4F and Floramite SC, both of which kill the adult mites AND the eggs. Forbid 4F seems to be the stronger of the two, since it kills all kinds of mites. Forbid 4F offers knockdown and residual control of mites and whiteflies. The active ingredient in Forbid is spiromesifen. I purchased a 5mL bottle of Forbid 4F on eBay, which makes 8 gallons and is more than enough for a small volume grower.
Compare miticides such as Forbid & Floramite here :
Miticide Chart
Many colors of tropical hibiscus. The first blooms are here and these are my favorite hibiscus plants in our backyard. Both were purchased online from Tried And True Hibiscus Store. They are potted in 12" containers with Jungle Tree & Shrub potting mix.
Gator Magic
Dancing Fire
Are your hibiscus buds dropping off prematurely? Hibiscus bud drop is a sign that something is wrong. In some cases, it's the hibiscus gall midge. The gall midge is a small fly thats lays its eggs inside flower buds. As the larvae hatches from the egg, it feeds inside the flower bud until it drops to the ground. Once on the ground, the larvae exit the flower bud and enter the soil to pupate. After a couple weeks, an adult gall midge emerges from the soil and the whole cycle starts again.
If you suspect gall midges, it's relatively easy to identify. Look for yellowing flower buds and pick one off the plant for inspection. Carefully open the flower bud and look for tiny worm-like larvae inside. Another trick is to pickup any dropped flower buds and put them in a sealed ziplock bag. After a couple hours, check the sealed bag for small larvae that have exited the buds.
Most spray pesticides are ineffective as they don't come in contact with the larvae. The key to controlling this pest is to treat the plant with a systemic pesticide to kill larvae inside the flower buds and treating the soil around the plant to kill off any larvae that have entered the soil. For a systemic pesticide, I sprayed Bayer 3-in-1 (active ingredient: imidacloprid) on the plant. For soil treatment, I sprinkled Bayer Complete Insect Killer granules. On top of this, I made sure to pick up any dropped flower buds and put them in a sealed ziplock bag so the larvae could not escape into the soil. Be persistant to catch dropped buds to ensure your capturing the larvae. After a week or two, the flower buds will stop falling off and your plant will be midge free.
In late July, I purchased some hybrid tropical hibiscus seed on eBay. The seller shipped them from Australia, which makes them even more special. On eBay, it is normal for auctions to sell hybrid tropical hibiscus seed in lots of only 5 seeds, and they will usually name the Pod parent and Pollen parent.
Today I sowed 3 seeds from two different hybrid crosses
Tigerama X Bali Sunset
Rosalind X Dragons Breath
Preparing Seed for Planting:
Before planting, you want to nick the seed coat with a razor blade to speed up germination and prevent rotting. Do not nick the seed on the tapered end, where the root first emerges upon germination, as this will damage the seed. Always nick the seed on the rounded side (opposite side of tapered end).
Seed Starting Media & Sowing Instructions:
Always use a sterile media for starting hibiscus seeds, this again prevents the seed from rotting during germination. I recommend Jiffy Seed Starting mix as a good starting media. I also used Jiffy Peat Pots and had excellent germination rates. Seeds should be planted 1/4" deep and should germinate in about a week as long as temperatures are around 80 to 85° F. When you plant the seeds, don't overwater them. Misting with a spray bottle works really well. The soil should only be damp, not soggy and wet.